We have recently added some new features for s3-compatible accounts like
custom s3 regions and region specific enpoints,
and hope these improvements will make your work with s3-compatible storages even more effective and comfortable.
In this article we would like to show you how to employ these new features with
Wasabi - an S3-Compatible object storage.
Registering Wasabi Account in S3 Browser:
1. Start S3 Browser and click Accounts -> Add New Account.
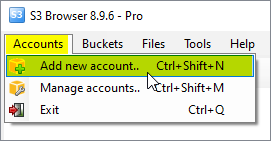
Click Accounts -> Add New Account
Add New Account dialog will open:
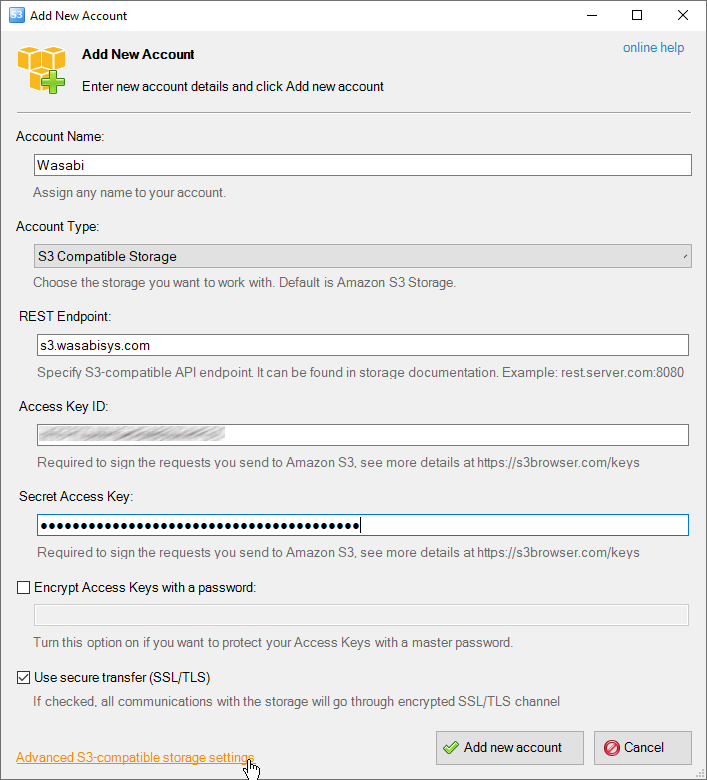
Add New Account dialog.
2. Choose S3 Compatible Storage as account type
3. Specify the REST Endpoint - s3.wasabisys.com
5. Specify Access Key ID and Secret Access Key - access keys can be found in your
Wasabi Console/Access Keys
6. Turn on Encrypt Access Keys with a password - if you would like to protect your
Access Key ID and Secret Access Key with a master password. You will be asked for a master password each time you open the account.
7. Turn on Use secure transfer (SSL/TLS) - if you would like to encrypt all communications with the storage.
8. Click Advanced S3-compatible storage settings
The Advanced S3-compatible storage settings dialog will open:
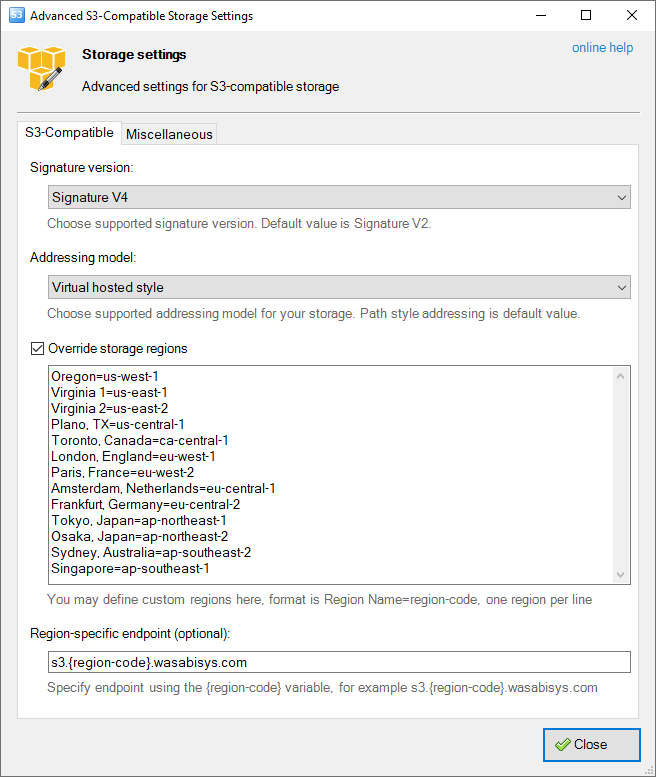
Advanced S3-compatible storage settings
9. Set Signature Version to V4.
10. Set Addressing Model - to Virtual-hosted style.
11. Define Storage regions as below:
Oregon=us-west-1
Virginia 1=us-east-1
Virginia 2=us-east-2
Plano, TX=us-central-1
Toronto, Canada=ca-central-1
London, England=eu-west-1
Paris, France=eu-west-2
Amsterdam, Netherlands=eu-central-1
Frankfurt, Germany=eu-central-2
Tokyo, Japan=ap-northeast-1
Osaka, Japan=ap-northeast-2
Sydney, Australia=ap-southeast-2
Singapore=ap-southeast-1
12. Define Region-specific endpoint as s3.{region-code}.wasabisys.com
13. Click Close and Add new account
Voila, you can now acccess your buckets in any region via direct region-specific endpoints
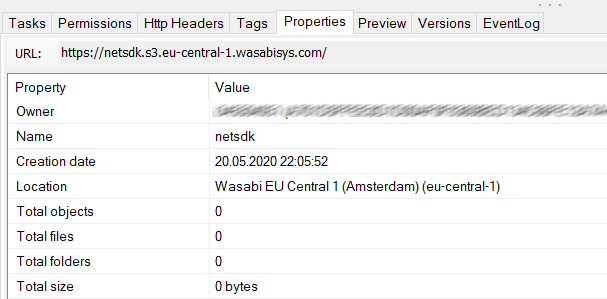
Custom S3-Compatible storage Regions
Create new buckets in any region supported by the storage:
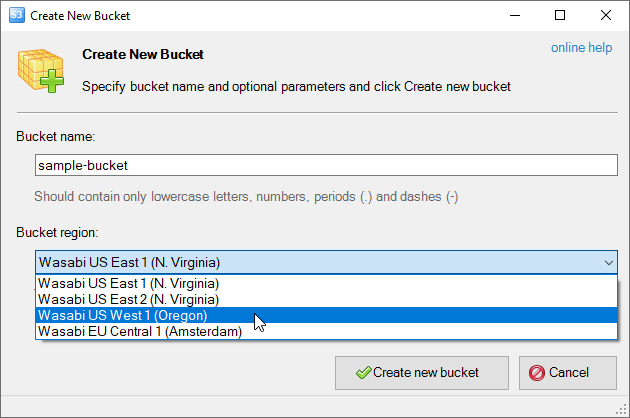
Custom S3-Compatible storage Regions

