CloudFront Invalidation - Table of Contents
CloudFront Invalidation Overview
Amazon CloudFront allows you to to remove one or multiple files from all edge locations prior
to the expiration date set on those files. The invalidation feature is helpful in unexpected circumstances,
for instance an occasional update to your website's css file, in which you need to remove the file from
Amazon CloudFront. Invalidation can also be helpful in the event that offensive or potentially harmful
material needs to be removed before the specified expiration time.
Note: Invalidation requests for the first 1,000 files each month are provided at no additional charge;
above this level, there is a $0.005 charge for invalidating each additional file.
Since version 3.4.7 S3 Browser supports
CloudFront Invalidation and below we will show you how to invalidate CloudFront Distributions using S3 Browser.
To Invalidate Single Files and Folders
1. Navigate to the bucket and select the files and/or folders you want to invalidate.
2. Click Files -> CloudFront -> Invalidate Selected Files
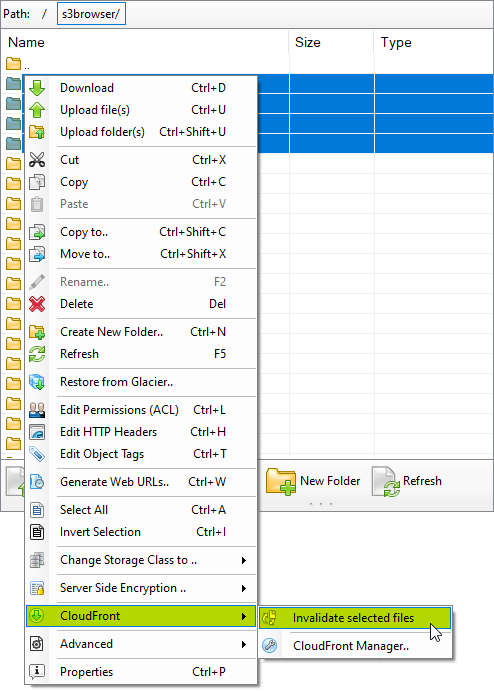
Select one or multiple files and/or folders and click Files/CloudFront/Invalidate selected files...
S3 Browser will send invalidation request for the files and/or folders you selected.
Invalidation usually takes about 10-15 minutes, depending on the size of the request. You can check invalidation status using
Invalidation Batches Monitor.
To Invalidate an Entire S3 Bucket
1. Navigate to the bucket you want to invalidate
2. Click Buckets -> CloudFront -> Invalidate selected bucket
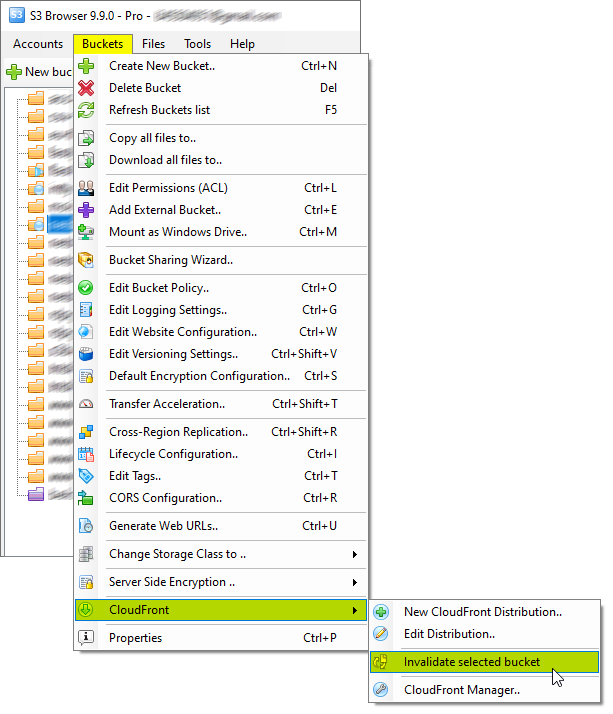
Select the bucket you want to invalidate and click Buckets, CloudFront, Invalidate selected bucket
S3 Browser will enumerate bucket contents, prepare invalidation batches and send invalidation requests.
What if my bucket is associated with more than one Amazon CloudFront distribution?
If the bucket you selected is associated with more than one distribution,
you will be asked to choose the distribution:
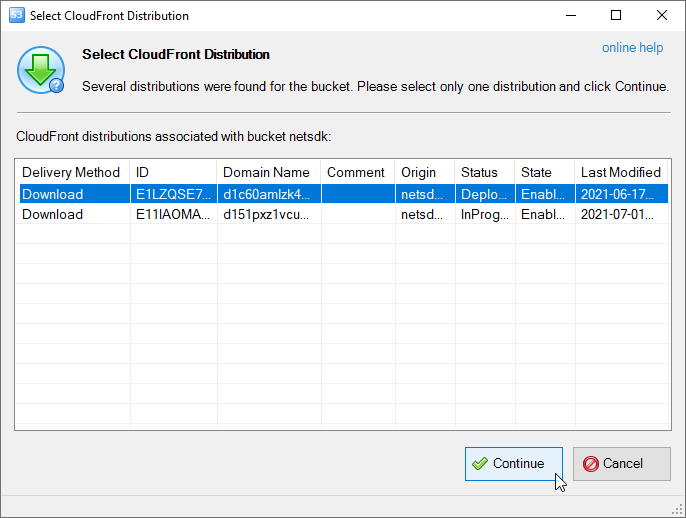
Using this dialog you can select the distribution to invalidate.
Select CloudFront Distribution and click Continue. You may also invalidate multiple distributions using
CloudFront Manager
To Invalidate One or Multiple Distributions
With S3 Browser you may also invalidate multiple distributions with one click.
1. Click Tools -> CloudFront Manager
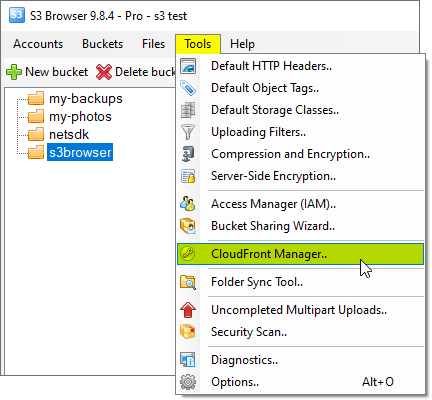
Click Tools, CloudFront Manager
The CloudFront Manager dialog will open:
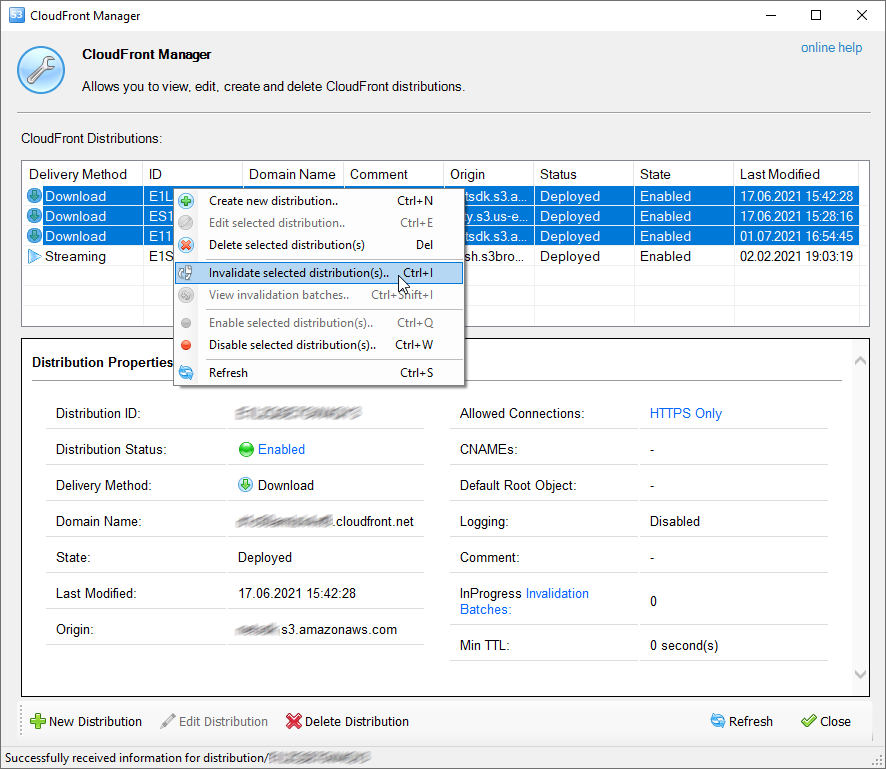
Select Download distributions you want to invalidate and click 'Invalidate selected distributions..'
2. Select distributions you want to invalidate, right click and choose Invalidate selected distributions..
Please note, CloudFront Invalidation is not available for Streaming distributions.
3. Confirm invalidation request:
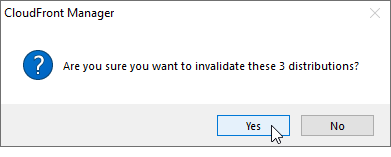
Confirm invalidation request
S3 Browser will invalidate selected distributions.
If you selected custom-origin distribution(s), you will be asked to enter file paths to invalidate (see below).
How to Invalidate Custom-Origin Distributions
If you wish to invalidate custom-origin distribution, you need to enter the file paths manually,
because there is no way to obtain them automatically.
S3 Browser shows the following dialog if you are requesting custom origin invalidation.
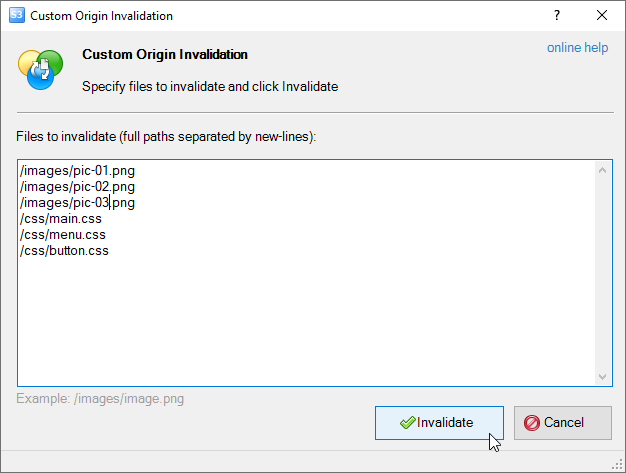
Custom Origin Invalidation dialog. Enter full file paths and click Invalidate.
Enter file paths separated by newlines and click Invalidate.
Invalidation Batches Monitor
Invalidation Batches Monitor allows you to view all invalidation batches associated with the distribution.
To open Invalidation Batches Monitor:
1. Click Tools -> CloudFront Manager
2. Select the distribution, right click and choose View invalidation batches
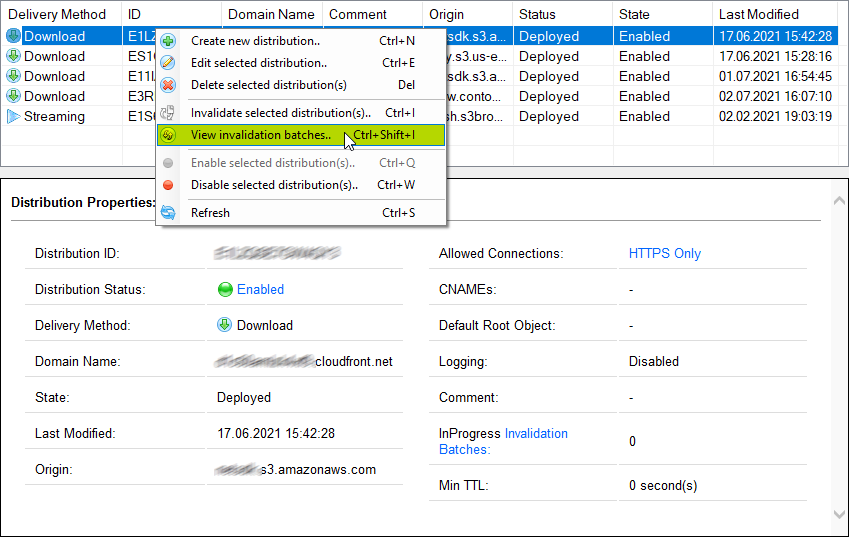
Select the distribution, right click and choose View invalidation batches
The CloudFront Invalidation Batches dialog will open:
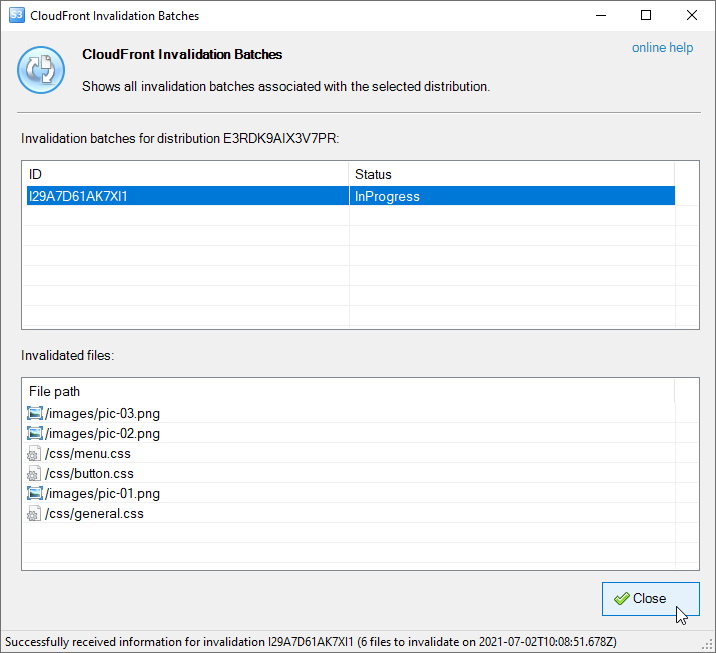
CloudFront Invalidation Batches dialog shows all invalidation batches associated with the distribution.
This dialog shows all invalidation batches associated with the selected distribution.
To view invalidated files click on the invalidation batch.
Related CloudFront Articles
|

