S3 Browser Freeware
comes with an easy to use New CloudFront Distribution Wizard that provides you with a quick and easy
way to create new CloudFront distributions.
Please follow the steps below to create new CloudFront Distribution:
1. Click Tools -> CloudFront Manager:
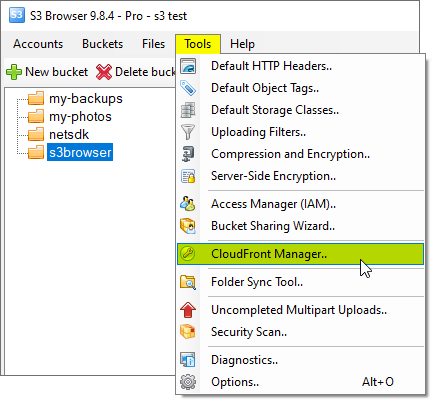
Click Tools, CloudFront Manager
The CloudFront Manager dialog will open:
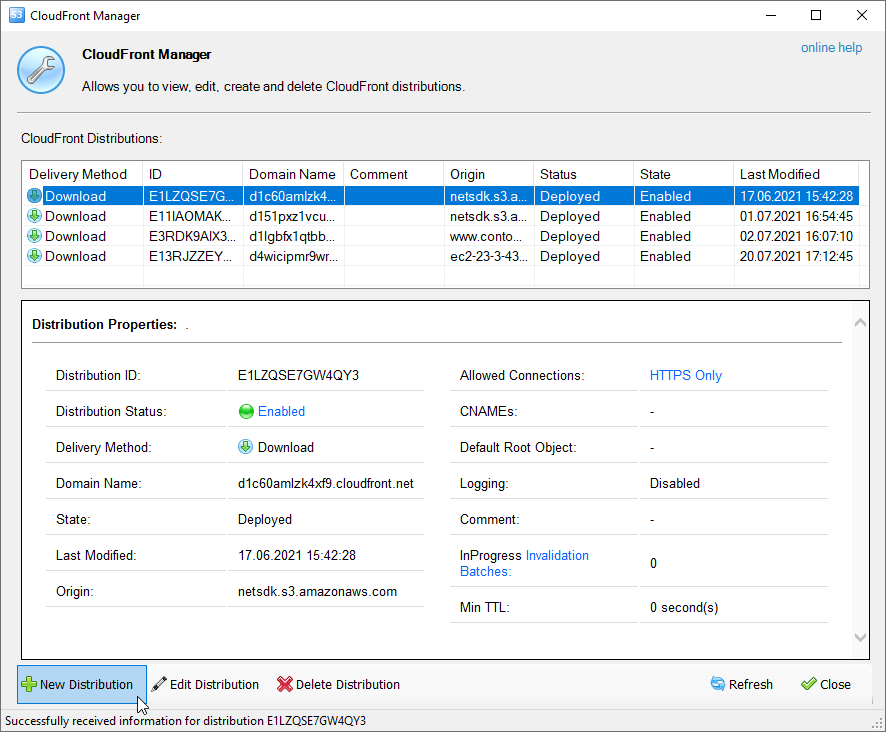
CloudFront Management Dialog
2. Click New Distribution
The Create New CloudFront Distribution Wizard will open:
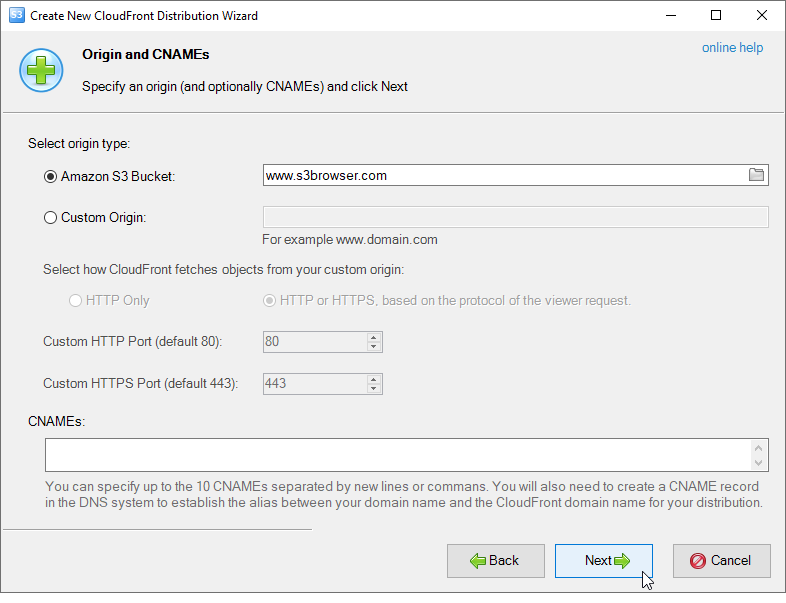
Configure an Origin (and optionally CNAMEs) and click Next
3. Here you can configure an Origin and CNAMEs.
Choosing the origin server
An origin server is the location where you store the original, definitive version of your objects.
For CloudFront, your origin server is either an Amazon S3 Bucket that you own, or a Custom Origin.
When you use Amazon S3 Bucket as your origin, you place any objects you want delivered
through CloudFront in an Amazon S3 bucket.
A Custom Origin is any origin server that isn't hosted on Amazon S3.
A custom origin might be located on a set of servers you manage privately, or it could be an Amazon EC2 instance.
For Custom Origin you can also configure additional parameters:
Protocol Policy (How CloudFront fetches the objects from your custom origin) and
Custom HTTP and HTTPS ports (80 and 443 are default values).
Specifying CNAMEs:
You can specify up to the 10 CNAMEs separated by newlines or commas.
Using CNAME you can choose a domain name for your links instead of the domain name CloudFront provides you.
Download and streaming distributions support CNAMEs.
Note: You will also need to create a CNAME record in the DNS system to establish the alias between your
domain name and the CloudFront domain name for your distribution.
6. Click Next.
The Logging page will open:
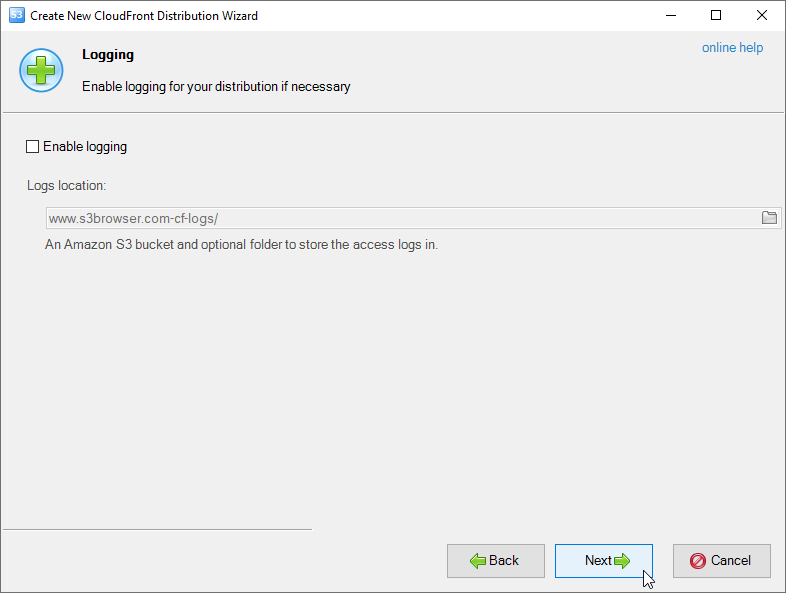
You can enable Logging for your CloudFront Distribution if necessary.
7. Here you can enable Logging for your CloudFront Distribution.
Access logs are activity records that show you details about every request delivered through Amazon CloudFront.
They contain a comprehensive set of information about requests for your content, including the object requested,
the date and time of the request, the edge location serving the request, the client IP address, the referrer
and the user agent.
To enable logging for your distribution:
A. Tick the Enable logging checkbox
B. Specify Logging Bucket - An Amazon S3 Bucket to store the access logs in.
C. Specify Logging Prefix - An optional string of your choice to prefix to the access log filenames for this distribution.
8. Click Next.
The Advanced Properties page will open:
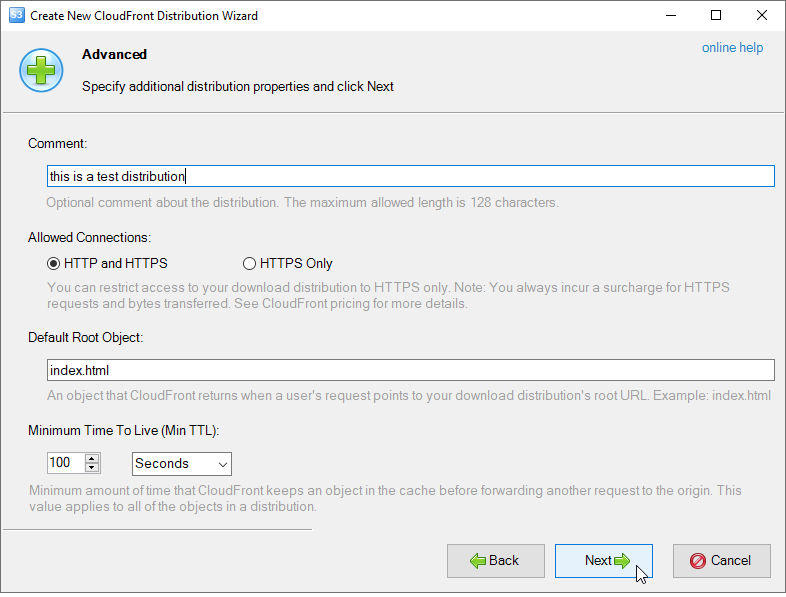
You can enable Logging for your CloudFront Distribution if necessary.
9. Here you can specify additional distribution properties:
Comment - Optional comment about the distribution. The maximum allowed length is 128 characters.
Allowed Connections - You can restrict access to your download distribution to HTTPS only.
Note: You always incur a surcharge for HTTPS requests and bytes transferred.
See CloudFront pricing for more details.
Default Root Object - An object that CloudFront returns when a user's request points to root
of your download distribution instead of a specific object. Defining a default root object avoids
exposing the contents of your distribution. Example: index.html
Minimum Time To Live (Min TTL) - Minimum amount of time that CloudFront keeps an object
in the cache before forwarding another request to the origin. This value applies to all of
the objects in a distribution.
10. Click Next.
The Distribution Summary page will open:
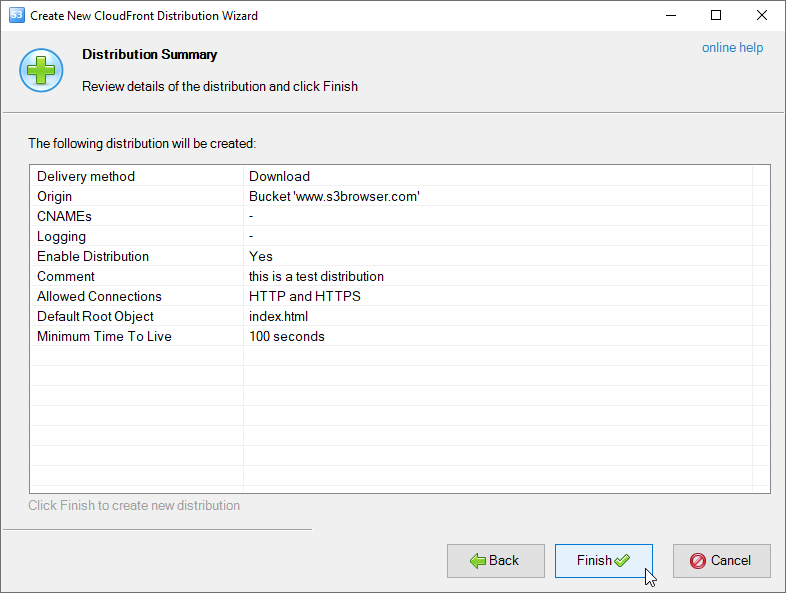
Review details of the distribution and click Finish.
11. Review details of the distribution and click Finish (you can also copy distribution details using context menu).
S3 Browser will create a new CloudFront Distribution.
